
Imagine scanning an old photograph and finding a thin line across a jacket. It looks like a crease, so repairing it seems an obvious first edit. Then a second scan reveals an intact sleeve: the line came from a hair on the scanner glass. The photograph never needed that particular repair.
An AI Photo Editor can produce a cleaner candidate, but a new capture answers a different question. It can show whether a suspicious mark belongs to the print at all. Before asking a generator to fill a gap, establish whether the missing detail was lost in capture, file compression, or damage to the physical print.
A Second Scan Can Explain the First Defect
Begin by looking at the print itself under ordinary, even light. Does the line remain visible when you change the viewing angle? Is it a scratch, a fold, a surface reflection, or something resting on the scanner? Avoid cleaning or flattening a fragile photograph just to settle the question; a delicate original may need specialist handling.
If the print can be scanned safely, check the scanner glass according to its care instructions and make another capture. Keep the capture settings comparable. Changing automatic contrast, sharpening, crop, and resolution at the same time makes it harder to explain why the second file differs.
Inspect the same small area in both captures. A hair that disappears after the glass is cleaned gives you evidence about the capture defect. A mark that remains in the same place on the print may be physical damage or part of the photographed scene. Its persistence narrows the possibilities without settling what originally lay underneath it.
The distinction matters when using an AI Photo Editor on a scan. PicEditor AI can generate an enhanced version from the uploaded image; that generation is not an independent observation of the physical print. An apparently restored seam might be a plausible reconstruction of what the model expects a jacket to contain.
A fresh capture is especially valuable when the available file is a small image saved from a message. Ask whether a larger original scan still exists before spending time on enhancement. You may be able to remove a layer of compression or an accidental crop simply by returning to the better file.
How Three Inputs Separate Cleanup From Invented Detail
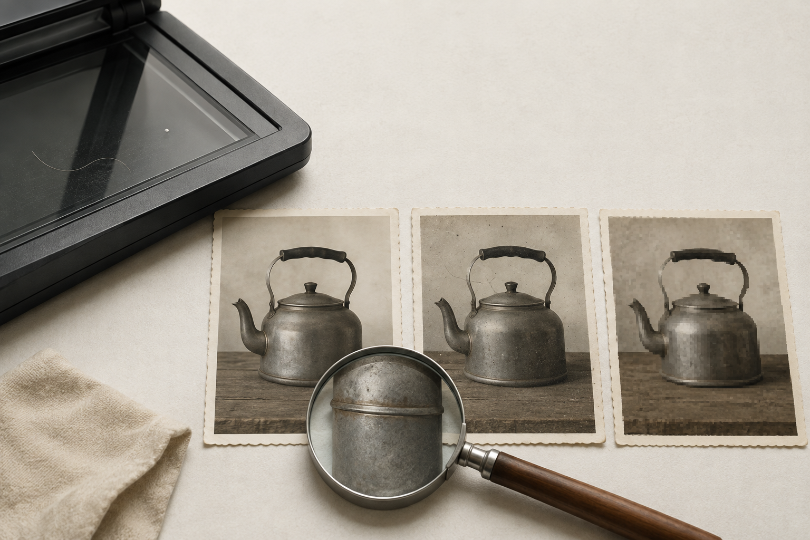
A small desk experiment can make this distinction easier to judge. Use a photograph you are allowed to copy, preferably one with an object whose edges and small fittings are visible. The following is a proposed test, not a report of measured results. Keep the physical print available throughout the comparison.
Compare a Fresh Scan With Capture Contamination
Start with the clearest available scan as the comparison image. If you already have a scan affected by dust or a hair, retain it as the second input; do not deliberately contaminate a valuable photograph or scanner. Identify a few places where the mark crosses a known edge and a few where it crosses a plain background.
Those areas test different demands. Removing a spot from an empty wall may require little visible reconstruction. Removing one from a tiny clasp requires a decision about the clasp’s shape. If the clean scan shows that shape, you can compare the candidate with actual detail. If it does not, the candidate’s neatness supplies no missing reference.
Use a Compressed Copy to Expose Ambiguous Edges
Make a compressed working copy of the clean scan without overwriting it. This becomes the third input. Look for an edge that has become blocky or a texture that has merged into a patch. Keep the same crop visible in the clean file, the compressed copy, and any enhanced output.
An AI photo enhancer should be judged against that known comparison rather than another attractive generated version. If a candidate adds a screw, stitch, or button absent from the clear scan, the added detail is a failure for a faithful copy even when it looks convincing.
Also compare candidates where the print itself is unclear. Different button shapes or seam directions across outputs expose uncertainty in the reconstruction. Agreement does not prove accuracy either: several candidates can make the same plausible guess. The useful evidence comes from the print, a clearer capture, or a reliable alternative image of the detail.
Cover the enhanced versions briefly and write down what you can identify in the reference. Then uncover them and compare the written description with the newly visible details. Anything absent from your description needs another look at the reference. This is a viewing exercise, not a forensic validation method.
More Output Pixels Do Not Recover Missing Evidence
PicEditor AI’s enhancement route offers a Resolution control, including a 2K option, and uses an enhancement prompt to generate the result. That gives you a practical choice about the size of a display copy. It does not establish that a newly crisp feature was present in the photograph before damage or compression.
With an AI photo enhancer, compare the output at the size you intend to use as well as close up. A larger, smoother sleeve may be useful for a family presentation. A sharply rendered new button has a different consequence if someone later uses the image to identify a uniform or date a garment.
Match the viewing scale during comparison. A larger file fitted to the same window can look smoother simply because its pixels are displayed differently. Compare the same subject area at a comparable size, then inspect the whole image at its intended display size. Keep those two judgments separate.
Set the purpose before choosing the candidate. A decorative display copy can tolerate a clearly acknowledged interpretation that would be unacceptable in a historical comparison. For a factual caption, omit claims that depend on reconstructed details. A small visual improvement should not quietly change what the accompanying words assert.
There may be no reason to generate the whole photograph again. If reacquisition removed the glass artefact and the remaining softness is unobtrusive at display size, use the new scan. PicEditor AI becomes useful when an enhancement candidate offers a visible presentation benefit that survives comparison with the best available reference.
Choose the Repair With the Smallest Unsupported Change
Start with the best capture you can obtain safely. Accept a repair because it resolves a visible problem for the intended use, and keep ambiguous detail ambiguous when no reference can settle it. The sharpest candidate does not automatically make the most faithful copy.
PicEditor AI fits people preparing clearer display images who are willing to compare the result with their source. It should not be treated as confirmation of a historical detail that the source cannot show. A second scan that removes one real capture defect can teach you more than a dramatic reconstruction of the whole photograph.